

Blend For Visual Studio 2017 Download
Visual Studio is an Integrated Evolution Surround(IDE) developed past Microsoft to develop GUI(Graphical User Interface), Spider web applications, console, spider web apps, mobile apps, cloud, and web services, etc. To install and utilise Visual Studio for the commercial purpose 1 must buy a license from Microsoft. For learning (non-commercial) purpose, Microsoft provided a complimentary Visual Studio Community Version. We will apply the Visual Studio Customs Version 2019. The latest version of Visual Studio makes the whole process very easy for ASP.Cyberspace applications. There may be some variations in the steps for installing and setting up the Visual Studio IDE. Then we recommend installing the latest version of Visual Studio.
Steps for Installing & Setting Up Visual Studio 2019
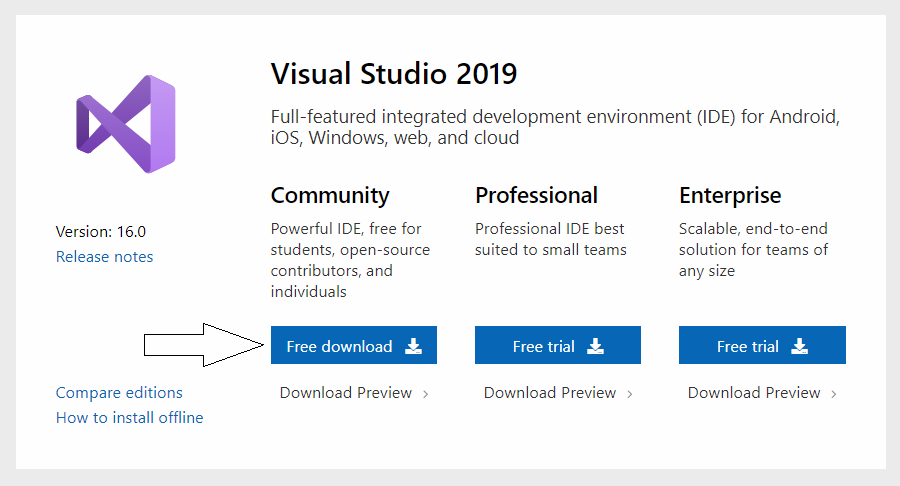
Footstep 1: Download the Visual Studio Community Version 2019
Step 2: Run the .exe file and follow the instructions to install Visual Studio Community Version on the arrangement.

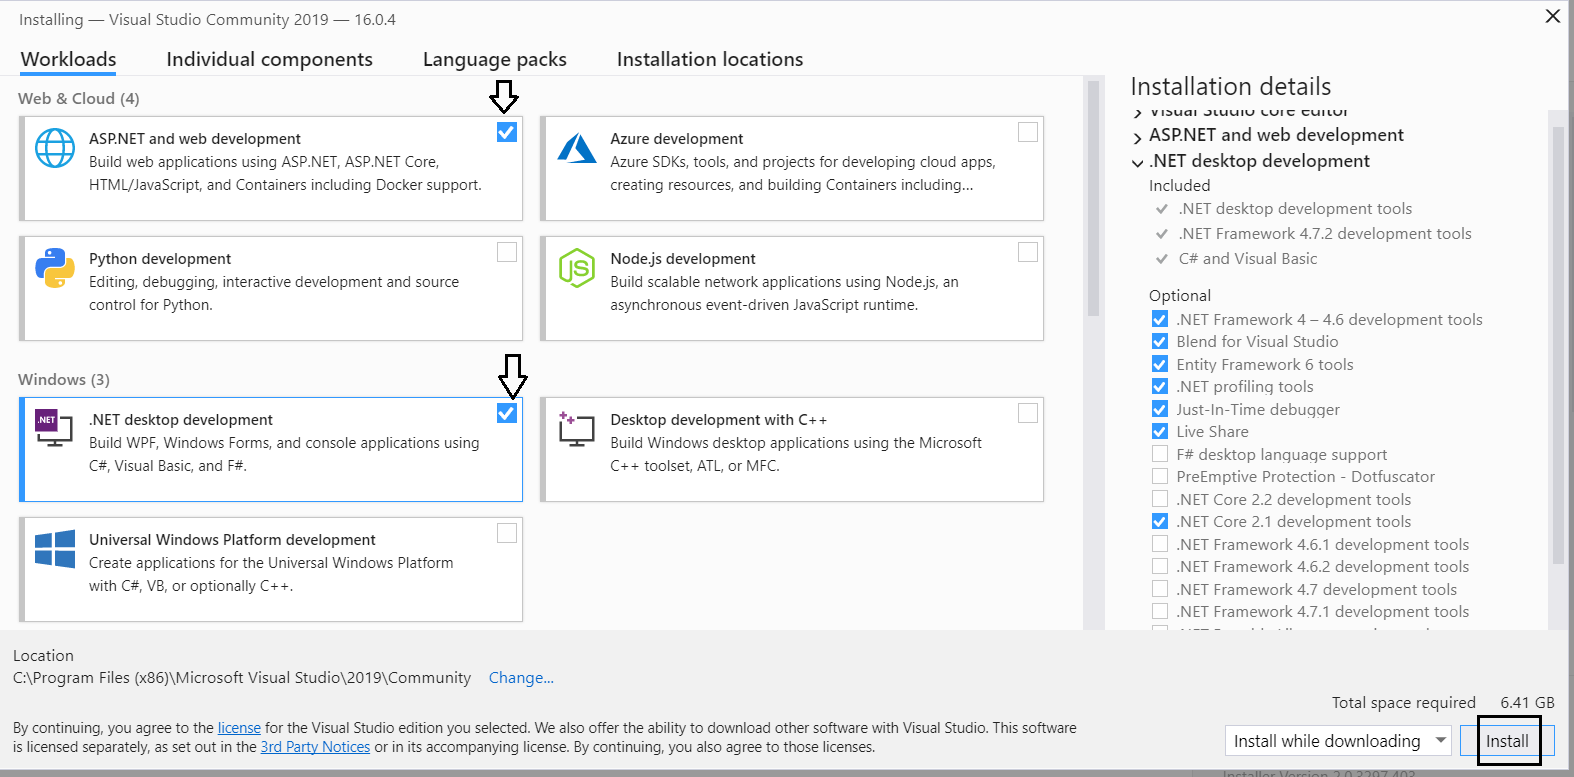
Pace iii: Select ASP.Net and web development from the options and click to install in bottom right corner as shown below. We can also select .Cyberspace desktop development choice for windows forms and panel applications etc. Here we are selecting both the options. We can also modify it after installation.

Step 4: Click on launch and information technology will exist prompted to sign in for the first time. The sign-in stride is optional then information technology can exist skipped. The dialog box volition appear for the first time merely and ask to choose the Development Settings and color theme. Once select required options, click on Start Visual Studio option. This step is optional in some versions.
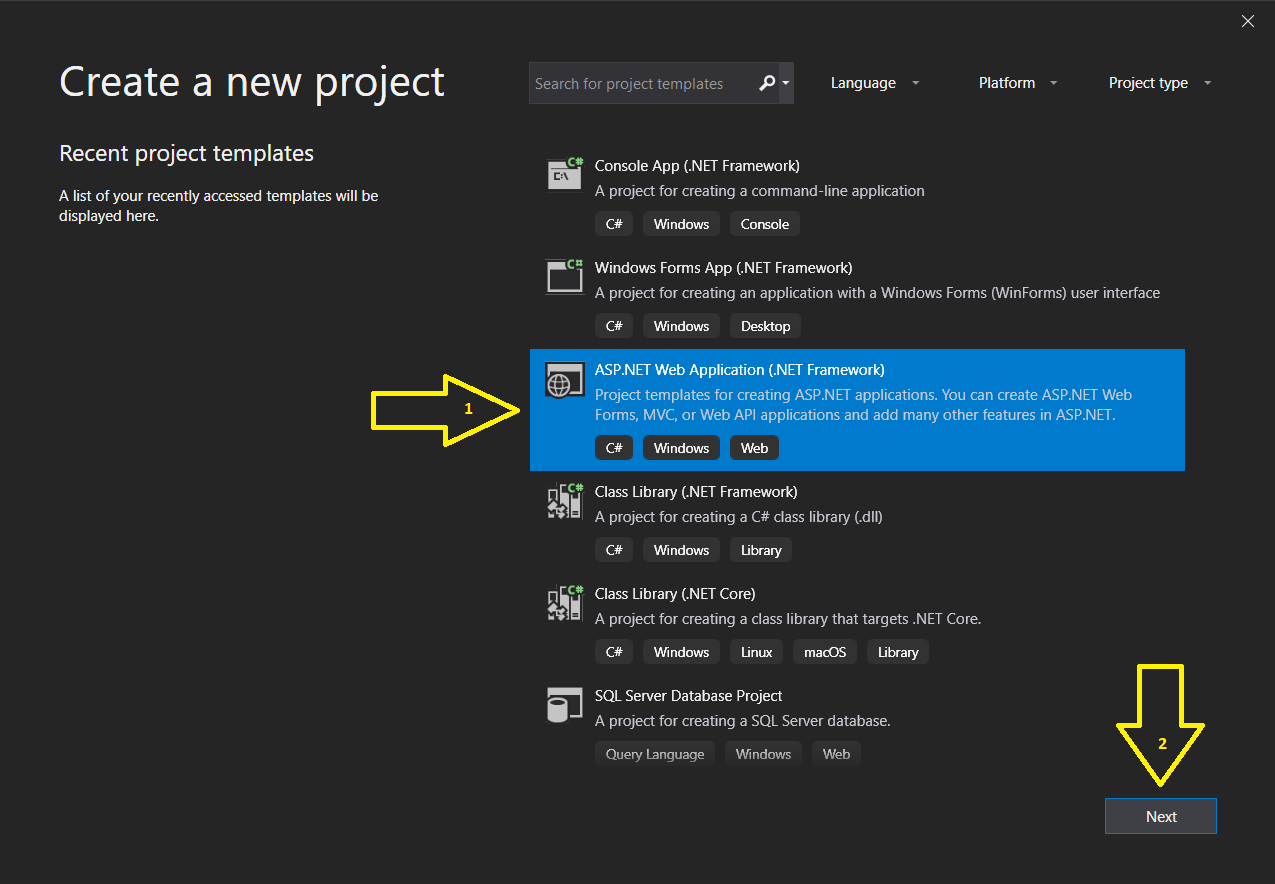
Step v: To create a new ASP.NET Web application, Go to File –> New –>Project like as shown beneath:

Step 6: As shortly as we select the project, we will discover the different options of the Project. We can filter them co-ordinate to our choice. We can run across the 3 filters(Language, Platform, Projection Type) on the right side of the search bar in the below given screenshot. Here we are non using the filters. We are simply choosing ASP.NET Web Application(.Cyberspace Framework) and click Next. Nosotros can see the options of C#, Windows, and Library below the chosen project. In that location are two choices equally nosotros tin can as well find the ASP.NET Web Application(.Internet Framework) using VB(Visual Basic).
Footstep vii: The side by side step is to configure the projection. Here, we accept to choose the Project Name and Solution proper name and click on Create Button. We tin can also change the location of the project. A projection name is a subset of the solution name. Nosotros can put a unlike name for the solution. In other words, the solution is similar a container for projects.

We are putting Projection name and Solution name every bit GeeksforGeeks as shown in the below screenshot.

Step 8: Hither, nosotros have to choose the blazon of the ASP.Net Spider web Application. We are creating a web application then get-go, choose the project type every bit Empty to understand a uncomplicated application. Then choose the Web-Forms which will add together the bones folders to create Web Forms Application. After that click Create button.

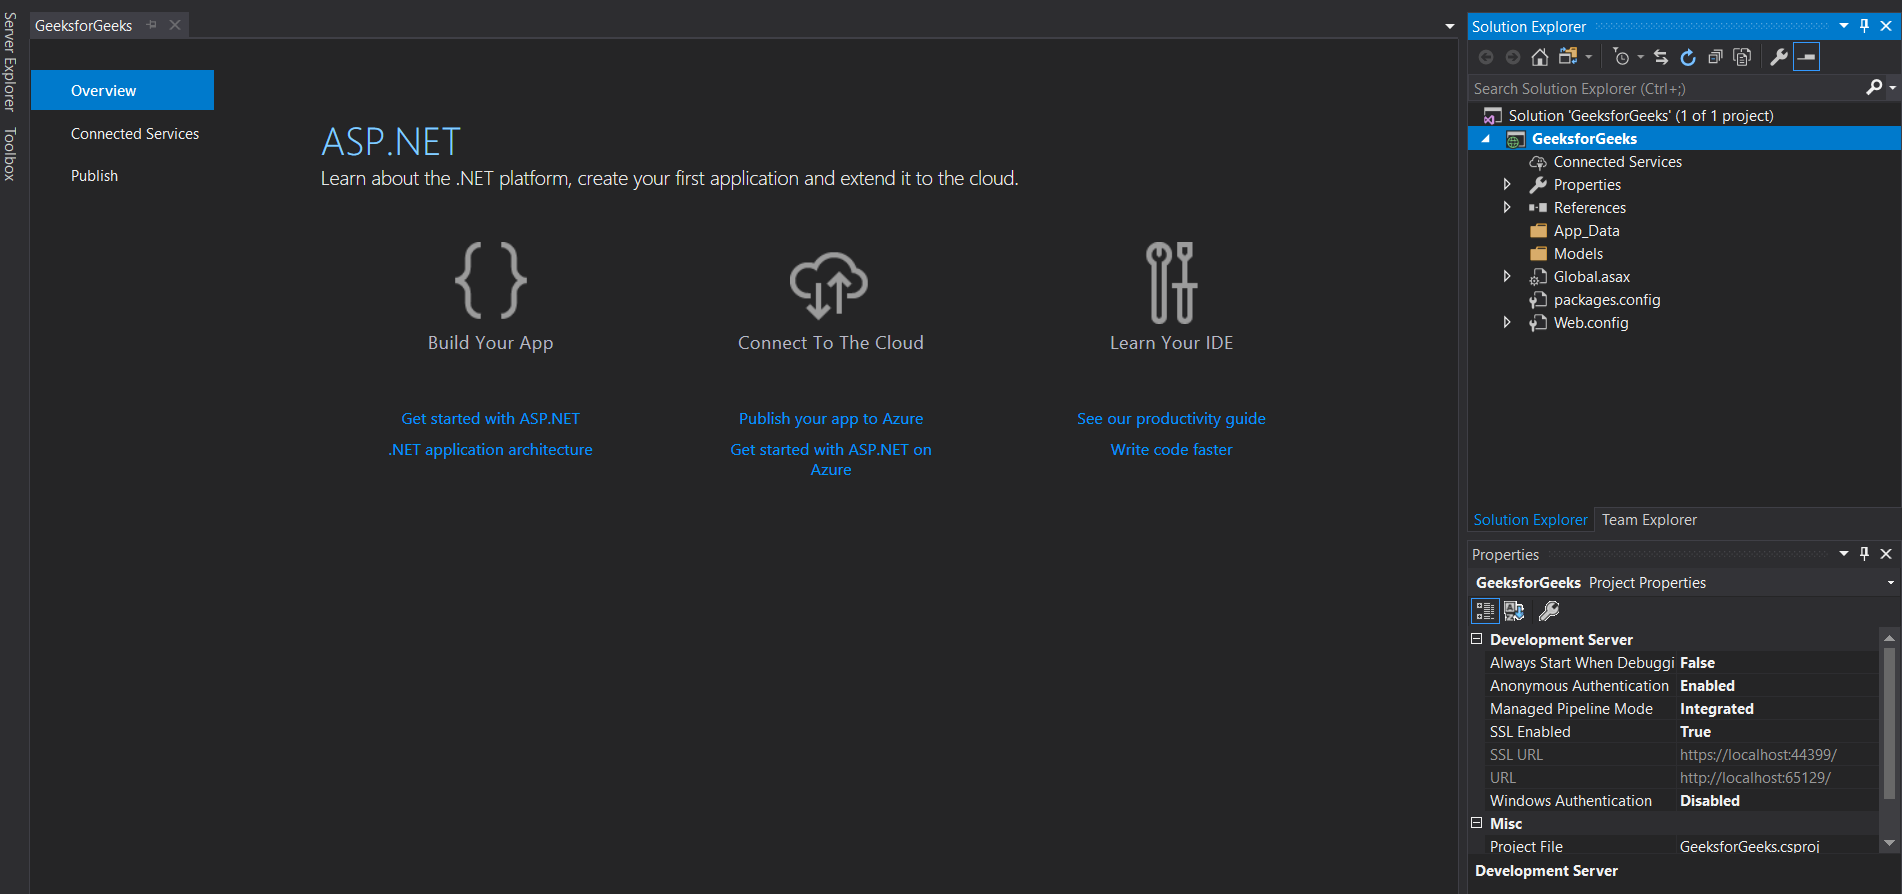
In the below image, in the right-hand side, the Solution Explorer is open by default. There we can run across a file Global.asax.cs which is a mutual file for the entire application. This file contains specific data related to the application and used to initialize application specific variables to their default values.
Step 9: Now add a Web Form file to the project "GeeksforGeeks" which contains the web-specific code for the project. Just Right click on GeeksforGeeks in the Solution Explorer. Select Add and then select Web Grade from the menu as shown beneath.

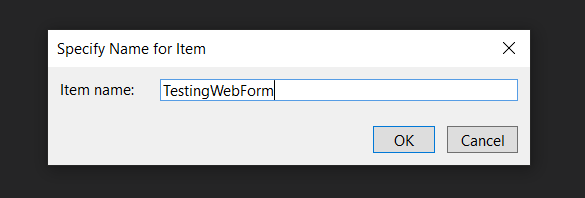
Information technology will prompt for the name of the Web Form. Nosotros are putting the name as TestingWebForm and click OK.
The default code for the TestingWebForm is shown as below:

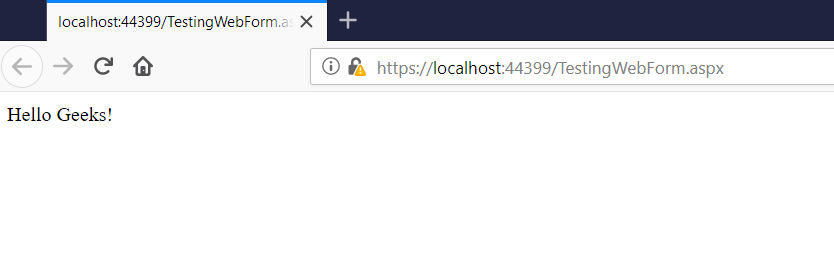
Step x: Now write a sample code in TestingWebForm.aspx file which will display "Hello Geeks!" as an output. The explanation of code will exist discussed farther.

<%@ Page Language="C#" AutoEventWireup="truthful" CodeBehind="TestingWebForm.aspx.cs" Inherits="GeeksforGeeks.TestingWebForm" %>
<!DOCTYPE html>
< head runat = "server" >
< title ></ title >
</ caput >
< body >
< form id = "form1" runat = "server" >
< div >
<%Response.Write("Hello Geeks!"); %>
</ div >
</ grade >
</ body >
</ html >
At present to execute the lawmaking, click on the Run push as shown in below screenshot. For the first time, we may need to set up the browser configuration.

Finally the Output:

Blend For Visual Studio 2017 Download,
Source: https://www.geeksforgeeks.org/how-to-install-and-setup-visual-studio-for-asp-net/
Posted by: degroathaddry.blogspot.com
0 Response to "Blend For Visual Studio 2017 Download"
Post a Comment